Showing posts with label beauty. Show all posts

Wednesday, April 16, 2014

Mainstream Trends for Lolitas Spring 2014

One of my first blog posts, way back in the day, was lolified versions of mainstream trends. At the time, I was getting much more interested in mainstream fashion due to my customer-facing job, and since I enjoyed writing it so much and have found myself in a similar place sartorially, I've decided to bring it back for Spring 2014! As I don't exist in a lolita-specific bubble, nor do the rest of us, it's become one of my pastimes to keep up with this season's trends for my work and general non-lolita wardrobe. I've never been a trend-chaser, but looking at mainstream fashion recently has actually proved to be quite inspirational for my lolita coordinates as well. While we obviously do have our own trends that crop up, I feel like they aren't as diverse or rapidly-changing as the mainstream world is, so even they can get boring at times.

For example, some huge trends right now is layered chiffon, longer hemlines, and more mature color schemes, but many of the American lolitas I know have been doing that for years already. I remember planning my spring/summer wardrobe for 2010 and waxing poetic about those exact same looks, and I have friends of five years whom I've never seen in a regular cotton blouse or with exposed knees. Trends in lolita take years to build up, whereas in main stream fashion they're gone and forgotten within months. While that's slightly intimidating, and certainly would be costly to keep up with religiously, I think that turning to mainstream fashion for lolita inspiration can not only keep the subculture interesting, but since we can expect our malls and department stores to carry these items, it can be a great way to expand a lolita wardrobe as well. 

Three Mainstream Fashion Trends for Lolitas, Spring 2014

Spring 2014 Trends, Lolita Versions - orchid, bold lips, fancy shades, flower crowns
The top 3 mainstream trends for lolita, in my mind, are bold lips (particularly in orchid), embellished sunglasses, and flower crowns. A bold lip can be a great way to tie a secondary color more profoundly into your coordinate, as with the shades of purple in the outfit above. Particularly fab for the spring and summer sun, embellished sunglasses are an unexpected accessory for lolitas - bonus points if they're star- or heart-shaped; here, the little 3-D roses mimic the flowers in the Lady Sloth skirt's print, while bringing some pastel life to the otherwise muted piece. And finally, flower crowns/headbands feel to me like something that mainstream fashion actually borrowed from lolita, instead of the other way around; they've been growing in popularity for the past few springs, but this is certain the heyday for lolita flower accessories.

Those are my top three mainstream trends for lolitas this spring/summer, but there are so many good ones, I couldn't only pick one coordinate's worth!

Bonus Extra Set!

Lolita coordinate with sheer accents
For this outfit, the only spring trend I went with was the previously-mentioned chiffon. While in lolita it's common for us to wear full pieces of chiffon, such as a blouse or ruffled underskirt, I've noticed that mainstream fashion is being drawn more to pieces with bits of chiffon mixed in with other fabrics, such as cottons, synthetics, and satin. When I saw this Angelic Pretty dress, I knew it was perfect for this trend, and I just couldn't pass up the opportunity to design a coordinate around it!

So, readers, I'm curious: do you follow mainstream fashion trends?

And if so, which are your current favorites to mix with lolita?

Wednesday, September 12, 2012

Lolita Makeup Review: They're Real! Mascara by Benefit


A few weeks ago, I was killing some time downtown while waiting for my boyfriend to get off work, and somehow I ended up, after a good bit of coaxing, in the makeover chair of a Benefit boutique. While we began by discussing concealers, after hearing that I had a couple minutes to waste, my sales associate ended up going to town and showing me a huge host of her best-sellers du jour. One of these was the brand new They're Real! Mascara, which I was told is currently the best-selling mascara in the world - and let me tell you, I can see why!

The marketing for this product is something I'm still on the fence with- it plays off of aspects of femininity which are often "faked" by women, alluding specifically to plastic surgery such as boob jobs, to go with the false-lash effect the mascara imparts. On the one hand, it's sexy without being demeaning, and in my opinion, kind of empowering - it says that whether you're "real" or "fake" (eg, whether yours is natural or artificially-enhanced beauty) is your own damn business, not the casual observer's, so why not keep them wondering? On the other hand, it does hold up this obsession with secretly-artificial beauty which, masquerading as natural, therefore means that people have to work harder to be considered attractive to society, which distances themselves from their own natural beauty.


However, as someone who really doesn't mind looking "fake" sometimes, I'm not terribly bothered by this. Which is convenient, really, because this mascara is honestly mind-blowing! As a lolita who's always had problems with false lashes (*shakes fist at latex allergy*), I'm a huge fan of over-the-top mascara. My associate put the mascara first on only one eye and held up the mirror - and I must admit, I was so shocked I burst out laughing! It honestly looked like I had just put on a pair of large and noticeable but still natural-style false lashes, and I immediately demanded the product be sold to me - after, of course, it was applied to my left eye as well as my right.

The mascara itself thickens, lengthens, AND curls- my eye shape is slightly asymmetrical, so I usually have to curl my left lashes even when I'm not curling my right so they look the same, but I was impressed to see that I didn't need to do that with this! My naturally long, thickish lashes were enhanced to falsie-proportions as well. This is combined with a pretty interesting wand, which has little spikes sticking off the ends- hard to see in this picture (indeed, hard to photograph at all, especially when you forget to clean it off first...). These are designed for getting in really close to the shorter, thinner lashes on the inner corners of the eyes and also the lower lashes, if you swing like that. It leads to greater accuracy when detail is needed and, therefore, a better end result with fewer mistakes.


Left: just with mascara. Top right: totally bare. Bottom right: with full make-up

It's a bit hard to see in these pictures, as, well, I'm still getting used to my new phone's camera (fancy phones with fancy phoneography! Welcome to the 21st, Lumps!), but even still, you can see how much thicker my lash line looks, as well as how much wider it makes my eyes. Combined with full make-up, my eyes are more prominent, rounder, and more doe-like.


As much as I love this product and don't regret the impulse buy, it's probably not something I would have bought if I'd thought about it a little more. I'm more inclined to buy mascara that can be layered so that I can put a less noticeable coat on for work or casual wear, and then add a bit more for nightwear or lolita, and at $23 a pop, this mascara isn't exactly as multi-faceted as I would have hoped. However, it works amazingly at what it's intended for. Also, it's worth it to point out that you're gonna wanna go with the industrial-strength makeup remover for this bad boy - if I don't, or if I only give it a quick, lazy wipe, I'm left with black gunk under my eyes for about three regular soap-and-water washes. While this reflects well on how long-lasting this mascara is (definitely not going to need to reapply over the course of the day!), it's also kind of frustrating, as it deters me from wearing this product on lazy days when I may not want a whole face-load of makeup. Again, works great, but makes it a much less versatile product than I'd prefer for the price point.

Verdict: Four out of Five. This can do amazing things, and I definitely recommend it, but its lack of versatility means it didn't deserve a perfect score, in my book.

Wednesday, November 30, 2011

Common Lolita Beauty "Don'ts"


I'm definitely not an beauty expert, but every lolita -hell, every PERSON - knows that make-up has two affects on your overall look: it either enhances or detracts. There are some lolita make-up moves that I've noticed in the past few years which seem, to me, rarely to do the former and almost always do the latter.

As with any part of your coordinate, everything you do with your make-up should be considered objectively to make sure it's enhancing the image you're going for. If you were wearing a completely sweet coordinate, for example, entirely of mint and pink, would you put on a big, black, gothic headdress? It may be interesting circumstantially, but for the most part, I'd advise against it. It's the same with make-up: if it detracts from the look of the rest of your outfit or overpowers it or negatively draws attention to itself, you're better off going without.

As always, remember: there are exceptions to every rule, so don't think of these as hard, concrete facts. Almost everything I mention here, while I'm typing, I think, "Yeah, but there was that really cute girl at the meet-up who..." or, "Yeah, but what about that picture you saw on Tumblr the other day?" So if I knock down your favorite make-up tip, please don't be offended! There are right ways and wrong ways to do everything.

A Loose List of Lolita Make-up Don'ts:

♥Over-concealing: One of the biggest parts of lolita make-up is a porcelain, doll-like appearance, and that's not always very easily-achieved by us humans, who're prone to redness, blemishes, and even skin tone. However, it's important to resist the urge to go really crazy on the Erase Paste, as concealers and foundations and primers and powders can cake up really easily and look overdone. Over-doing it will draw attention to whatever it is you're trying to cover up and can settle in the lines in your face and make you look old, which is not exactly the way to achieve effortless, light, child-like beauty. Lord knows I can be prone to this one myself, hence why it's right at the top of the list!

♥Lining the lower lash line: Now, this isn't always bad, but in a lot of alternative fashion I often see heavy black liner under the eye with nothing in the lid. Here's the problem with that: a dark, heavy line along the bottom of the eye pulls the onlooker's eye down and makes it look like the wearer has heavy undereye circles (could I have said the word "eye" more in that sentence?!) Instead, what looks better is a thin line of eyeliner all along the upper lash line (maybe getting a little thick toward the outer edge, or finish with a cat-eye if you're feeling fancy) and line only the outer third of your lower lash line- from the outer corner to the iris, or colored part, of your eye; this will make your eyes look wider and brighter, and therefore more awake. Bonus points if you use a soft shadow instead of thick, heavy liner on the lower lash line.

♥Pink or red eye shadow: To be perfectly honest, I almost didn't include this one, because I see it often, and it's very often done right. However, with certain skin tones, pink or red eye shadow or liner will make your eyes look red, making you look tired, like you've been crying, or like you have pink eye, none of which are very loli at all! If you're very gung-ho about using one of these colors in your make-up look, try to either find a shade that compliments your skin tone, or pair it with a neutral and use the pink/red as an accent color.

♥Wash your face at night!: This is such a big one for everyone, but especially lolitas, to go back to that porcelain look we try so hard to emulate. If you don't wash off your make-up and sweat and all the other nastiness we accumulate during the day, it'll cause breakouts. I'm pretty sure everyone knows this, but it bears repeating! A daily cleanser and a moisturizer should be used once a day, and deep exfoliation once a week. Another quick fix are make-up remover wipes. Or, if you're thrifty, bathroom wipes with vitamin E and aloe- they have to same active ingredients but are much less expensive!


What are your least-favorite make-up techniques that show up on lolitas often?
(No naming names!)

Monday, November 1, 2010

Make-up Review: Drugstore Bargains

Make-up is definitely one of my passions. I'm not going to lie, I don't wear it every day (or even, really, on a regular basis), but I adore everything about it and have even acted as a make-up artist for a fashion show for I Do Declare. My problem with make-up? I just get bored so easily. I really need to be experimenting and trying new things at all times to keep my interest in the subject, and while I can try out different techniques for different products, eventually you need to branch out and widen your prospects. My other problem? Usually I'm quite the make-up snob. I flat-out refuse to use any mascara besides Smashbox Bionic, and I only wash my face with either tinctures I make myself or organic Boscia cleanser, both of which carry a notable price tag at Sephora. But times is tough, and I've realized that if I'm looking to flesh out my arsenal and expertice, I may need to cut some corners. That's why, a few weeks ago, armed with reviews from the forums at Glamour.com and holding my breath with slight trepidation, I ventured into my local drugstore and purchased not one, not two, but four new products for me to try out.


I must admit, I was not really in an adventuresome mood. I went in for liquid liner and dark brown eyeshadow, and of course, as I am wont to do, ended up straying a good amount from this path and into the unknown. Instead, I picked up L'Oreal HiP Studio Secrets Professional Crystal Shadow Duo in Darling (details), L'Oreal HiP Color Rich Cream Eyeliner in brown (details), Maybelline Lasting Drama by EyeStudio Gel Eyeliner in Blackest Black (details), and Burt's Bees Lip Shimmer in Rhubarb (details). All of these cost close to what one or two similar product would at Sephora or MAC - for twice the goods, how can you go wrong?! For this review, I'm going to focus mainly on the Maybelline gel eyeliner and the L'Oreal cream eyeliner, which I found to be the most interesting products in the purchase, though the others are included in some of the pictures.

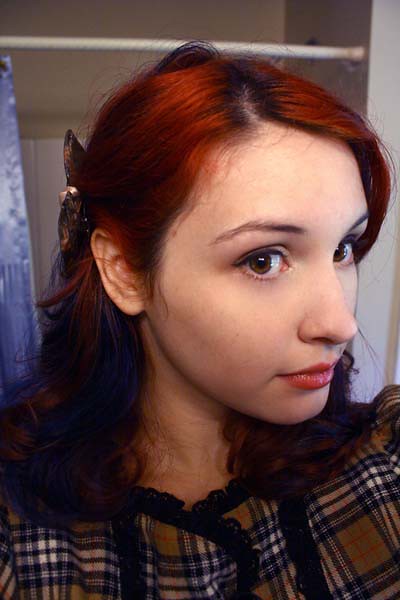
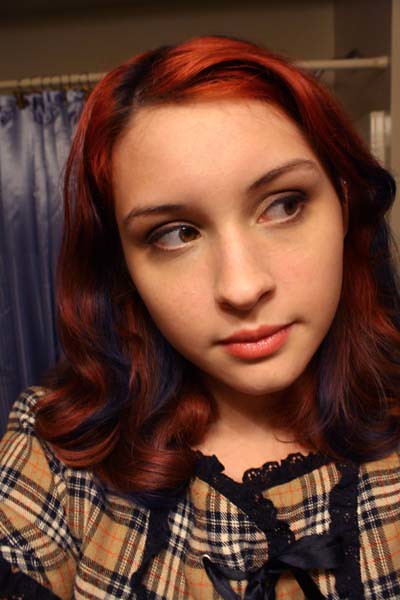
First up was the gel eyeliner. This was what I was most intrigued about. I love eyeliner - if I chose one product to wear every single day, it would probably be eyeliner. It's like painting... on your face! But seriously, I feel like eyeliner is one of the most versatile, impactful parts of a look, and once you get a few techniques down, it's one simple tool that you can use in many different ways. On this evening, I was practicing a dolly-kei look to model for Martha's NYAF panel Out of the Woods (pictures and write-up here!); since I was going for a dark, dramatic look, I did something of a cat-eye.


This is dusted with a bit of the crystal eyeshadow, as well - the brown on the outer corner, the cream on the inner. It also has a slight, understated shimmer which the light caught a bit on the bottom corner! As you can see, the line is dark and smooth, with few inconsistencies. The brush's shape struck me as odd at first, as I'm used to a sharply angled brush and this one was smooth and round. I don't know the science behind this shape, and I don't have to - all I know is that it works beautifully. It was incredibly easy to apply and a cinch to layer - the brush by nature draws a very thin line, so it gives you more control with the shape and thickness of the line. I also love how crisp it looks - if you're more of a blender, I recommend applying a bit of pencil liner over the gel and blending (My rec? Maybelline Define-A-Line).

The liner from afar (also, the lip shimmer makes an appearance!):


Then, I moved onto the cream shadow. This one I was less-than-pleased with. The brush, for some reason, just did not sit in my hand right- it was awkward to use and, despite the thin shape, came out looking bulky and clumsy. Next time, I'll try my own liner brush and see how I feel, but I really think this one is destined to the Make-up Bag of No Return (the one shoved in the back of my closet).


See? I mean, there's nothing really wrong with it, something is just a touch... off. This may just be a question of personal preference, though - you may love it, and it's definitely a cool product to try out if you get the chance. I tried to camouflage it by adding some more of the crystal shadow, which I rather like - I'm unsurprised at this, as I also own the same product in black/silver (which I couldn't find online) and it's definitely my favorite eyeshadow I've tried (or at least up there!). I liked how layerable this was as well- it's easy to go light on this for a subtle shimmer, or dark and bold for a more dolly-appropriate look.
Here's another shot of the finished look:
Overall, I'm rather satisfied with my purchases. I've used all of these a few times since, and all I have to add is - Burt's Bees, what gives? The lip shimmer looks perfect here, but any time I've used it since the color looks much more awkward with my skin tone. Lighting, maybe? It's definitely still a joy to use - it's more of a lip balm than a lipstick, and it has peppermint extract in it, which isdeliciously tingly and smells lovely (no taste, though, so for the most part it stays on my lips and not my tongue). It's great to slap on before heading out in the brisk fall breeze (it seems like as soon as the temperature drops below 60F, my lips just instantly chap and remain that way until spring), but I think I'd chose something else for, say, a photoshoot or date night. However, the rest of these products are, as demonstarted, very versatile and can be used for everything from a meet-up to coffee with your S.O. - you should definitely go pick them up ASAP!
(Speaking of dates- and I just CANNOT keep this to myself, as anyone who's friends with me on Facebook knows - Stefan and I are making preparations for our most epic date ever: a week in Tokyo over spring break!! Nihon I've missed you sooooo~~~ ;;;o;;; look forward to a full write-up as well as planning tips, etc.!)

Wednesday, June 9, 2010

Dans le Boudoir

The lolita's guide to creating her own beauty retreat


A "boudoir" is, technically, a ladies' sitting room or private parlor. The word has always had decidedly feminine air to it (though it is derived from the French bouder, "to pout") and therefore, like all things innately womanly, has become an object of much intrigue and fantasy. The word "boudoir" brings to mind the genre of Boudoir Photography, which usually depicts beautiful women in various stages of undress in an elegantly luxuriant bedroom setting. However, "boudoir" also has the connotation of a private dressing room, in the old-fashioned, Rococo sense of the word: an entirely separate area where the Lady can be coiffed, made-up, and dressed by her maids.

For all these reasons, the boudoir has become a symbol of sumptuous leisure, of opulent respite with a little bit of sensuous mystery; the boudoir is a place where a woman can escape from the Real World for a little while, into a world of self-indulgence and personal beautification. And what can be wrong with that? It seems like a very lolita idea, to me. An entire room dedicated to beauty, an utterly vanity-free place where a woman can just enjoy being a woman - the boudoir is as feminine as it gets, and it's also all about a shameless self-appreciation that is, in my opinion, iconically both Rococo and lolita.

Unfortunately, most of us do not have a suite attached to our bedrooms that we can renovate into our own personal oasis. How does the modern Rococophile translate this desire into her own life, without commandeering her little brother's bedroom? First of all, just because the original boudoirs were attached rooms does not mean that yours has to be! A private dressing area can be as small as a vanity covered in exotic perfumes and artfully-arranged make-up.

Here are a few ideas for space-saving boudoirs:

♥If you have a large bedroom:
  • Separate your boudoir from your living area with a folding screen. Behind the screen, set up a dressing area: A few hooks on the wall from which you can hang the pieces you've selected to wear that day before changing (or a few of your favorite pieces - think of it as wearable wall art), a floor-length mirror (props for vintage!) and a vanity. For extra cute, if you have a dress form or two, dress it up in your favorite outfit and stand it in the corner.
♥If you only have room for a vanity:
  • Make that vanity adorable! If your vanity has a drawer, install knobs for pulls and hang necklaces off of them. Use teacups to keep track of loose jewelry like rings and earrings (or even as candles!). Pile up old-fashioned (preferably hardcover) books and/or use tea trays to add visual interest as well as maximize space. Buy a cute holder for your make-up (mine is a blackxwhite polka dot bag that rolls up with a little pink bow on the front) or, if you have a habit of buying make-up for its packaging - guilty as charged... - display them! A collection of make-up pencils and/or brushes would be adorable sticking out of a parfait glass, maybe with a few inches of colored marbles, beads, or faux pearls as an anchor. Line your perfumes and lotions along the back edge, in front of the mirror, so you can see them all and make the perfect selection for your mood that day. Write little messages to yourself ("You're beautiful!" "You can do it!" "Hang in there, gorgeous!") and stick them into the corners of the mirror. If yours is a desk-style vanity, hang an inspiration board above it instead of a looking glass and pin pictures and quotes to it that inspire you to express your inner beauty.
  • No vanity? Use the top of your dresser instead!
♥No room for a vanity? Make over your closet! Victoria Suzanne did a great brainstorm here for ways to make over the look of your closet. Making over your closet is a great way to add a little decadence to your bedroom without spending the money to redo the whole thing. Unfortunately, I helped Victoria with these original ideas, so I'm afraid I'm rather spent on exact ideas. However, a few extras are:
  • Remove the door and instead add some cute, cheap curtains that can be pinned open when your closet is nice and tidy or shut tightly when you're having a closet-meltdown
  • If you have shelves, use them not only for storage but for display! I have the top shelf in my closet decorated with a pretty Burberry bag (sat at an angle to show it off without taking up too much space) and a wig head displaying a wig, a vintage hat, and a vintage fur stole around its neck.
  • If you have a few different levels of hanging space, remove either the top levels or the bottom ones and hang up ornate hooks instead; hang dresses from these instead.
  • Get a shoe organizer with clear compartments to hang on the back of your door. Instead of using it for shoes, though, use it to store and display your socks or other bits and bobs like rolled-up waist ties or detached sleeves.
  • Or, use the inside of the door for an ornately-framed mirror or an inspiration board (explained above!)
  • Wall-paper or paint the inside of the closet, especially if you take the doors off. This makes the closet less of an afterthought and more of an extension of your bedroom. This is an excellent idea (brush ya shoulders off there why don't ya, Lumps) if you find a wallpaper you love but is a bit costly, because you'll need less than if you did the entire room but it will still contribute to the decor.
  • If you have a walk-in, how cute would a little stool or table be?! You can use it to display your brand plushies or a favorite standing object, like shoes or a purse.
Have you ever wished for a more beautiful, elegant time? Do you like shiny, naked cherubs everywhere you can put them? Do you wish you could put on three layers of expensive eighteenth-century clothing and giggle with seemingly-homosexual courtiers ALL DAY? Of course you do! Unfortunately, we no longer live in the Rococo period (and very, very few of us have access to Rococo Puffs, I'll bet). However, that doesn't mean we can't adopt some elements of Rococo-esque living for our daily lives; in fact, with the grating hustle-and-bustle we face every day at school or work, I think now it is more important to take a few moments to yourself every day. Some people do this in the form of meditation, reading, bubble baths... while all of these are noble pursuits, those of us who are used to a little more opulence need something more glamorous for our daily respite. In my opinion, this can be best achieved by the pursuit of self-love and furthering our personal quest for beauty inside and out.


I got Lichtenstein!!

Wednesday, May 26, 2010

Lolita Beauty on a Budget: Even the Kitchen Sink!


A few years ago, I moved into my own apartment. It was less than a month after graduating high school, and I found myself in a rinky-dink studio apartment with absolutely no money after rent for anything more than Ramen noodles, Pop-Tarts and Wendy's. I couldn't have been happier. However, you can imagine what a diet like that did to my health, and without money for the fancy lotions and potions I was used to pampering my skin with, I had to learn how to make due with what I had. Luckily for me, what I had was a corner store, a few dollars, and the Internet. With these simple tools, you too can build your own beauty regime for pennies! (/commercial)

My absolute beauty stand-by is, to this day, baking soda. For about $0.89 USD, you can buy a few months' worth, depending on what you use it for, and it does almost anything. Anything I need done, I use baking soda first, and if it doesn't work, I proceed from there. Usually, it works. I exfoliate my face with a tablespoon of baking soda mixed with about a teaspoon of water; I gently rub the paste in circles over my face and neck, then rinse. I follow it up with diluted apple cider vinegar as a toner, and my skin has never been softer. My hair is another thing I turn to baking soda for: normal shampoos are not only expensive, but they can also be bad for your hair because they strip natural, healthy oils as well as grease from your hair. Baking Soda, on the other hand, simply dries the grease from the outside of the follicle without penetrating through it and removing the good stuff. I use a tablespoon of baking soda to about a cup of water as shampoo, and the same concentration of vinegar to water for conditioner - if you have very dry hair or get very greasy, you should look into the No Poo method, as it's called! It also helps preserve your dye job, if you roll like that. No time to shower before dashing out the door? I run some dry baking soda through my hair at the roots, and it dries up the grease and keeps it looking nice until I can shower when I get home. It's also a natural deodorizer, so you can use it in place of deodorant if you have sensitive skin.

A few more tips:
  • Have a zit? Cut a clove of garlic in half and rub the cut side on it. Garlic is a natural astringent, so it will drastically reduce redness of new pimples that haven't formed a head yet. If that garlic won't work (say you can't stand the smell, or the zit has already popped), hold an ice cube on it for as long as you can before you go to bed at night. This will soothe the inflammation and the blemish will be noticeably less red by the next morning.
  • If you have bags under your eyes, cucumbers are not an urban legend! However, if you want something stronger, put two spoons or used black teabags in the fridge the night before, and place them on your eyes for as long as you can manage. The chemicals in tea are naturally healing, but the cooling affect is really the star here, so metal spoons work too.
  • For another great homemade exfoliator, mix one part kosher salt or sugar with two parts olive oil, or use this great aspirin face rub.
  • Lemon juice can be used to strengthen nails and give them a natural shine. Dip a Q-tip in fresh lemon juice and rub it onto your nails for a few minutes. Leave it on for about ten minutes. This can also lighten the white parts of your nail.
  • After you're done brushing your teeth, gently brush your lips with the toothbrush. This exfoliates them which makes them smooth, can help with chapping, and makes lipstick stay on longer and brighter.
  • Some foods that can be used to make great face masks are honey, yogurt, avocado, and oatmeal.
  • Hot Oil treatments are great to add shine and softness to your hair. Take a few tablespoons of olive oil (the length of your hair will determine exactly how much you'll need), heat it in the microwave for a few seconds (it should be warm but not so hot that it burns you) and rub the hot oil through your hair. Cover with a plastic bag and leave on for as long as possible, preferably over night but at least thirty minutes. Then, the trick to washing it out is to rub shampoo into your hair before getting it wet. Oil and water are NOT friends, and so if you saturate the oil with shampoo before wetting your hair you'll have a much better time of it.
Darling readers, what are your favorite home beauty tips?

Also, yet another new layout! I know, I know, I made the last one like a month ago and there are blogs who don't change their layout for months or even years, but... they're just so much fun to make! I went with a sort of "room" theme for this one, with things that reminded me of a Victorian parlor (striped "wallpaper" with pictures in ornate frames and pretty chandeliers). Also, for the background, it was originally pink but I made it blue instead - if you made it and want credit for it anyway let me know! I lost my original source...

Friday, May 14, 2010

Lolita Braiding Three Ways

Pink? Polka dots? Hearts? You know what that means - I've roped Victoria into another one of my hair-brained schemes for the benefit of my lovely readers. "Hair-brained" is certainly applicable this time, because here's a hair-spiration post featuring this season's hottest style: Braids! From mainstream to mori-girls, everyone has decided that the braid is back. I've always adored braids as a cute, simple way to jazz up any style, especially in summer when you don't want all that humidity melting your hairspray away. Since my hair is so dark, details don't photograph on it well, so I recruited Victoria to help me out (she sat complacently on her cellphone, figuring out how to link it to her e-mail). Here are some of my favorite braided looks for lolita:

The Crown Braid: An old favorite of mine, it's a touch tricky and takes some getting used to, but if you can master it, the affect is understated but very glamorous. Just take a small section of hair from just above the ear, and start braiding as close to the root as possible. If you can, hold the hair over your head while you're braiding, as this will cut out any lumps that may form when you lay it over the crown. Then... lay it over your crown. Here I secured Victoria's braid with a bobby pin that matched her hair under about three fingers worth of hair behind her ear. If you want, you can adorn the end of the braid with a bow or flower corsage, but here I didn't think it would be necessary, especially with how cute it is to have the pink braid over the blonde hair. A pearl headband behind the braid would be very classy as well.

Crown Corsage Braid: Ahh, so you've mastered the crown braid, eh? Well, here's the level-up. Instead of a regular braid that you pull over the top of the head, take a small section and french braid it across, behind your bangs if you have them. Once you get to the end, curl the tips of your hair around a finger, then keep rolling until you have a rose-like corsage. Secure with a few bobby pins. I can't claim credit for this look - I found it off Youtube tutorial. I can't find it now, but if anyone is interested I'm sure I could dig around for it!


Pigtails With Pizazz: And here is my favorite braided style- sick of normal braided pigtails? take a medium-sized section from the crown at the front of your part and braid it - when I do it on myself I can just do a regular braid, but for some reason Victoria's hair wasn't taking it, so I did a french braid itself. I think this looks much more streamlined than my usual style, but I definitely wouldn't have the patience to do that on my own hair! Maybe if I'm styling someone else's, though. Adorn the ends with anything you would use on normal pigtails, or for added cuteness channel mori-girl and stick some small wildflowers or feathers straight into the braid itself.

Monday, May 3, 2010

Golden Summer Make-Up Look

Summer is on its way back to the Northern Hemisphere! I'm psyched, personally - this means picnics after work, parties before class (yes, I'm taking a summer class as well - Biology of Local Plants! Totally stoked), and basically a lot of running around and doing a million fun things one after the other. Because of that, I needed a make-up look that was easy and classy, but could still transfer between work, school, and family events, then straight into lolita if it had to. That's why I designed this make-up look, inspired by that golden time of day right before sunset when I always seem to be outside in warm weather.

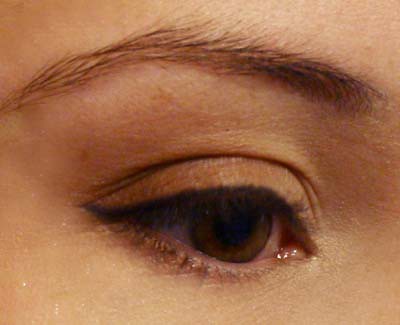
Eyes: A good amount of mascara (my technique: dust lashes with translucent powder, apply a tiny bit of mascara, curl, apply a bit more to seal the curl), and a thin line of liquid black liner to act as a base to the color, with a little wing at the outer corner to enhance the lashes. Cream shadow on the inner third of the lid and down into the inner corner of the eye to make the eye look wider and more awake, as well as a bit under the outer half of the browbone to enhance the eyebrows. I applied shimmery amber shadow on the outer corner, starting along the lashline and blended upwards, a bit heavier in the crease (but not much! Heavier dark make-up in the crease will look too mature for lolita, though it's lovely for daily wear). To finish, I lined my waterline with the same shimmery cream as above and dabbed a bit of translucent gold shimmer to just the inner corner.

Face: Start with SPF-added moisturizer to protect the complexion from the harsh summer sun. I then used a very lightweight foundation with a light dusting of mineral powder to cut shine &absorb oil. I didn't have any coral blush, which is what I really recommend for summer, so I only used a very light application of pink cream blush because it blends better. It also helps the bronzer stay on, which is really the secret star of this look and summer make-up in general. I played it up a bit more for the photograph than I would for daily wear so you could see where I applied it - just along the cheekbone. That's it! In the deep summer when I'm a bit tanner I'll apply it to the bridge of my nose and jawline too, but no more than that. Bronzer is meant only to enhance and add a healthy glow to the places on your face where the sun would kiss your skin, not to change your skin's entire color. Very common misconception! I've had so many people cringe when I say bronzer is one of my favorite types of make-up, because they think of something like spray-on tan. It's not so! In my opinion, no other type of make-up will make you look as healthy, refreshed, and awake as a good, tastefully-applied bronzer.

Lips: Since the eyes and complexion are the focus, I went light on the lips. I applied a light covering of Blistex with sun protection, and a light coral gloss over that. The lip balm not only locks in moisture and protects your lips, it will act as a primer and make your lip-gloss last longer. Remember with make-up that you should only have one major area of interest - a bright blush, intense eye make-up, or a killer shade on the lips. Combining too many of these will be totally overwhelming, even for dramatic wear.

The directions may look long, but mostly I'm just waxing poetic about bronzer- the whole look probably only took me about 5 to 10 minutes to apply, so it's perfect for throwing on before heading out in the morning and requires minimal touch-up during the day. I'm excited - it's going to be just as perfect for days on the beach as days at the office. Sigh... is it summer yet?!

Thursday, November 26, 2009

True or False?


image from weheartit.com

They're pretty common in lolita. Perfect make-up is almost a necessity, and eyeliner & mascara will do wonders to your eyes, but sometimes there's just one final, absolutely necessary step. Is it the rhinestones at the corners of her eyes? Is it the glitter shadow, or the perfectly-manicured brow? All are great ways to add to your look, but there's one last thing, and despite the fact that they're sometimes glaringly obvious when worn, it is by far one of the best ways to make your eyes look doll-wide, and no, I'm not talking about circle lenses. If a butterfly flapping its wings causes a hurricane by the time it travels around the globe, you'd hate to think what one wink from these babies could do.

Yes, today we're going to talk about false lashes. They might be intimidating, but if you find the right style &apply them correctly they can be SO worth it. They will make your eyes stand out more and look wider &brighter, making you look more awake - like you have big porcelain doll eyes. First, let's talk about styles (examples from Shu Uemura):

  • Natural Lashes. These are usually black or brown and made to just enhance your natural eyes. Usually they're the same length as natural lashes or only a little longer and slightly thicker. These are good for daily dressups and non-lolita wear - they'll enhance but they won't POP like "fancy" ones will.
  • Individual Lashes. These are individual clumps of a few lashes each that you place manually wherever you need. Directions for use here - I have never used them myself, but they seem to be an interesting idea &something I'd like to try in the future.
  • "Fancy" Lashes. These are the lashes favored by most lolitas, in my experience. They are big &dramatic &impossible to ignore. They come in hundreds of styles, from feathered to jewelled to glittery to colored to lace to... basically, if you name it you can find it. My favorites that I've worn myself are these with little pearls stuck THROUGH the lashes. Unfortunately I left them at my parents house and found them "mysteriously" cut to pieces with all the pearls pulled off. I think I know who the culprits are...

These are the main styles - obviously, within each there are hundreds &hundreds of variations, so shop around. Speaking of, where can you buy them? If you're interested in lashes for everyday wear, I recommend going to a high-end cosmetics store like MAC or Sephora and getting a really nice, natural-looking pair. However, for the crazier once-in-a-while styles, I've had amazing luck with Halloween and costume stores like Party City. If it's out of season or you live in a country or area where Halloween isn't celebrated (poor thing!), you can find them online as well. My Diva's Closet is very popular and has a great selection, but I've never ordered from them myself. Another thing to think about is adhesive. Many companies include a small sample tube with their lashes, but not always - check the packaging to make sure. There are also self-adhesive lashes - I don't love them, but they work for some people &are good for beginners who don't wnat to have to worry about glue drying. I'd like to point out that most adhesive contains latex, to which many people (including myself) are allergic. I found latex-free adhesive at my local beauty store but I'm nervous to try it out because of the horror stories I've heard about it: I remember hearing about a lolita who wore used a supposedly "latex-free" adhesive, only to wake up the next day with her eyes swollen shut because it wasn't exactly as hypo-allergetic as the packaging made it out to be. My reaction isn't terrible, but it was only recently that I realized that my eyes aren't supposed to itch &sting the entire time I'm wearing my falsies, so pretty soon I'll probably bite the bullet and try the latex-free stuff soon.

Okay, so you have your lashes: now, let's apply. There are many companies that make eyelash applicators, but they kind of scare me - curlers are intimidating enough! Make-up is not supposed to need machines! I just apply them myself, by hand, the old-fashioned way. Everyone has their own method, but here's what I do:

  • Apply all other make-up except mascara first - your primer, shadow, liner, etc.
  • Before applying glue, take your lashes and put them against your lashline to make sure they're the right length- trim if necessary from the inside corner.
  • Apply a thin line of glue on the lash band.
  • Wait a few seconds to give glue time to "set". Once it becomes tacky, you can begin applying.
  • Start at the outer corner and lay the lash on your eyelid as close to the lash line as possible. Press it into place &scootch it down a little further to ensure it stays as low as possible. Continue in the same manner with the center and inner corner, then repeat the whole process on the other eye.
  • Apply mascara (black, brown, or clear for funky colors). If you want, you can apply some liquid liner over the band, but I've never found it necessary. Curl lightly with an eyelash curler so your natural lashes stick to the fake ones.

&you're done! They're a little strange at first, but you should get used to them in a minute or two. If they still feel uncomfortable or even painful, remove them &reapply. After removing them for the day, clean the band &lashes with a bit of eye make-up remover - whatever you're using on the rest of your eye should be fine. Depending on how healthy your natural lashes are, it may be good to rub some petrolium jelly/Vaseline on them, as mascara &chemicals in other makeup can dry out your lashes, making them brittle &weak - I've never done this myself but I've heard it helps others.

Besides that, there's not much to it. Just be careful - a well-timed wink from one of these babies and you'll be the apple of any onlooker's eye. Use with caution, &be careful where you aim these things!

Tuesday, October 6, 2009

On Being Beautiful


Everything has its beauty, but not everyone sees it.
- Confucious

What is beauty? This is a question humanity has strived to answer probably since the invention of language. All those silly ancient geniuses - they didn't know what I know. For every person the definition of beauty is different - maybe beauty is making men want you, or being lovable or loved, or just being happy with yourself. What is beauty to you? Here's my opinion-

Beauty lies not in the body but in the heart &soul. This beauty we express with our bodies, but we can only do that by tapping into the beauty in our soul. A lolita spends hours getting dressed, coiffing, making-up, and then stands in front of the mirror and smiles. This happiness that is welling up from inside her - this is her soul set free and expressed in her body.

By today's standards, thinking like this probably makes me a "hippie." I have no problem with that - there are worse fates, worse labels society could have inflicted me with. Some of you will not like what I'm saying because of that - many people are made uncomfortable by talk of the soul these days. I don't understand it, but I don't have to. I don't live for them. It's for those of you who are smiling right now, who are reading and nodding and smiling in agreement - it's for you that I write (I speak, I document) for, not for those who are snickering and shaking their head in disbelief or even disgust.

Part of beauty, probably the most important part, is acceptance. Accept that your soul may not want you to look like other people's (or that maybe somedays it does - some days it may beg you to leave petticoats forlorn and comfort it in sweats or jeans or Uggs). I think that lolitas have gotten past this hurdle simply by being lolitas, by accepting that they love a sweet, frilly fashion that much of the outside world finds ridiculous.

We're used to not being accepted. We face it every day by the outside world - and occasionally in our own world, too. It is beautiful to accept that even the people you identify with may not understand or accept your beauty, whether these people are your family, your friends, or even our online lolita communities. It is beautiful to accept this with grace &dignity but to still express your beauty. However, it is important to respect yourself enough not to show this inner beauty to those who will not respect it. Sometimes it is more honorable to keep your beauty inside to protect it and yourself.

Beauty offends. Lolitas know this well. Offense is dangerous. While it is important that your body reflects your soul, protecting your mind &body are most important. An illustration of all these points would be the girl who posts to daily_lolita in a less than perfect outfit. She is trying to show the beauty in her soul, and she is calling that beauty lolita. It may not fit the rules we all follow, and many of us will tell her - not necessarily rudely (I'm not going to go into THAT here), but we will give her tips on how she can mold her internal aesthetic to fit this label more. She can choose to follow these rules or not - if she chooses to alter slightly her aesthetic and be approved of by the community (in which there is no fault), she will be accepted. If she does not, she doesn't need to expose herself to the community anymore. It's as simple as that - if you want to be accepted by certain people, cater to fit their ideas. If those ideas aren't something that sit well with you for whatever reason, distance yourself from those people and continue living as you feel you should. In this case, our "ita" can either conform to the rules of lolita and continue posting without complaint, or she can continue to dress as she wants but keep it to herself &for herself &not post it anywhere.

Though it hurts my Taurus (by which I mean my internal aesthetic &also my sense of justice &what is right or wrong) to admit this, sometimes internal beauty must be stifled for the health of the mind &body - but we must ask, what is the point of a healthy body if the soul ails? Therefore I leave the final decision up to you, as it often is circumstantial. Will you honor your mind, body, or soul? Is there a way to honor all three? Or, really, is there a difference between them?

LinkWithin

Related Posts with Thumbnails